Why Would You Want to Change Your WordPress Username?
When you first set up your WordPress site, you created a login username and password. However, at some point you may find yourself needing to change it. There are many reasons you might want to change your WordPress username. Below, are some of the most common reasons:
- You want to change the default “admin” username.
- It sounds too similar to another username on your website.
- You made a typo when you first setup your account.
- The website or account is being transferred to another person.
Whatever your reasons are, you’ll be happy to know that your WordPress username can easily be changed despite what it says in the dashboard. There are 3 different methods you can use to change your username. Below, I will go over each one in detail.
Table of Contents
- Use a plugin to change your username
- Create a new user and delete the old one
- Change your username in phpMyAdmin
Method 1: Use the Username Changer Plugin
There are a only a few plugins that can help you change your username. Username Changer is the most popular and for good reason. It’s lightweight, well reviewed, and extremely easy to use.
After you have installed and activated Username Changer, navigate to your Users > Profile page. Now, instead of saying “Usernames cannot be changed.” you will see a new option that will allow you to change your username. Click this link.
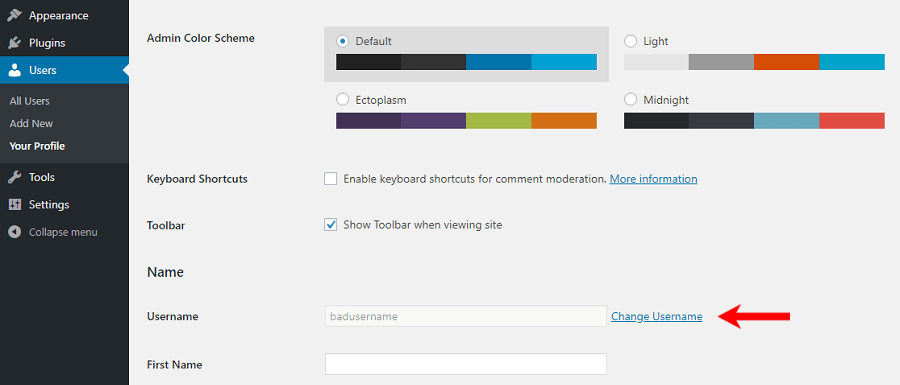
You will get an option to enter a new username. Type in your new username and click Save Username.
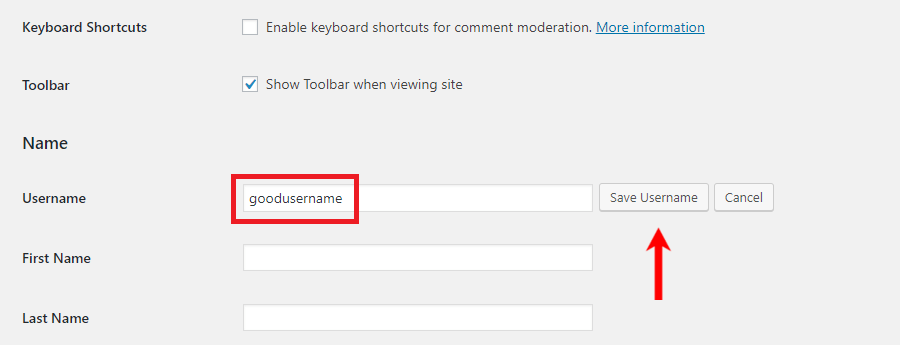
You should get a success message (Username successfully changed to goodusername) similar to the picture below. You will also be asked to log back in using the new username you just created. Your password will be the same as before.

That’s it! The Username changer plugin can also be used to change other users of your website. There is even a setting that will allow certain users to change their own username.
Method 2: Create a New User and Delete the Old One
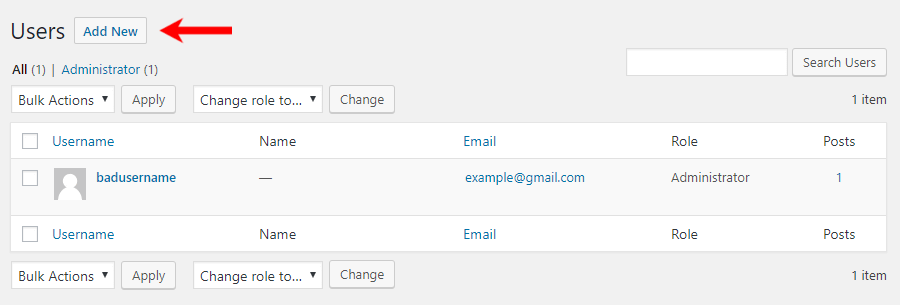
For this method we are assuming that you have an administrator account. Login to your WordPress dashboard and go to Users > Add New.
Enter your new username in the box and make sure you set the role as Administrator. If you are changing another user’s username, make sure to select the correct role for their account.
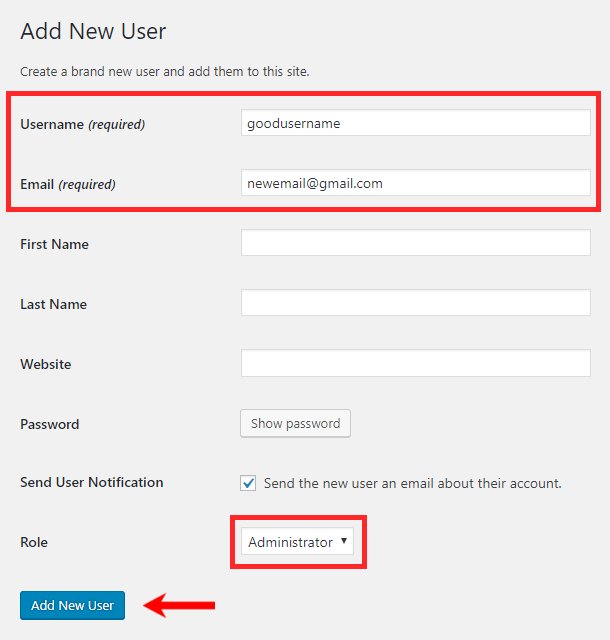
When you create this new user, you will not be able to use the same email. Create a new email for the time being. After you have deleted the old account (in the next step), you can change it back to the original.
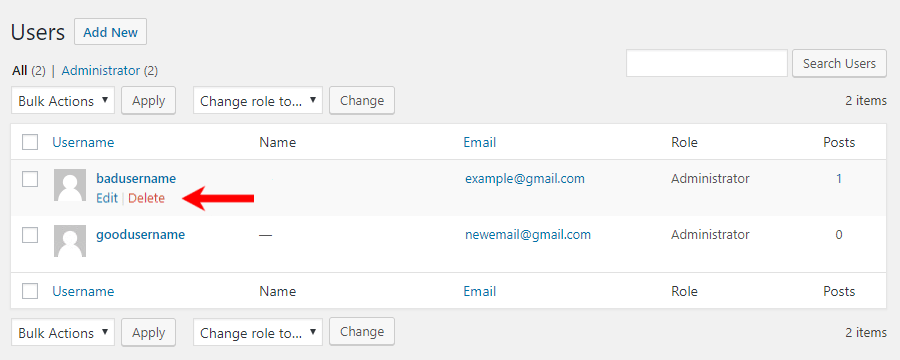
Now that we have created a new username, you will need to log out and back in with this account. After you have logged back in go to the Users tab in the dashboard and delete your old username.
On the next page, you will need to attribute all content to the new user. This will ensure that all of your existing posts and pages will now have your new username as the author.
Warning: Make sure you never select “Delete all content.” as this will delete every post and page you have ever created.
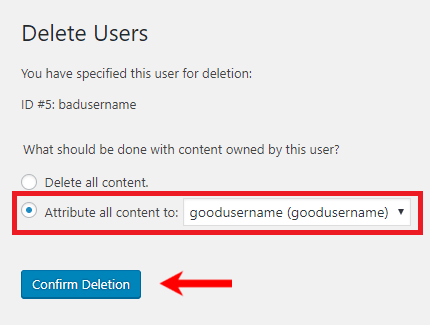
Then, click Confirm Deletion.
That’s it! Your new username should now function exactly as your old one did. You can verify this by looking at the Posts column in the Users area.
Method 3: Manually Change the Username in phpMyAdmin
Note: If you don’t feel comfortable editing your database in phpMyAdmin, It’s better to use the first or second method.
Before you make any changes to your database it’s always a good idea to get a backup. One wrong click or one small typo can completely break your website.
You can access phpMyAdmin by logging into your web hosting cPanel dashboard. Look for an icon similar to the one in the picture below.

How you access phpMyAdmin might vary depending on what web host you are using. If you are having trouble finding it, you should get in contact with your technical support.
Locate your database on the left hand side of the page and click it. This should bring up a page with all your WordPress tables.
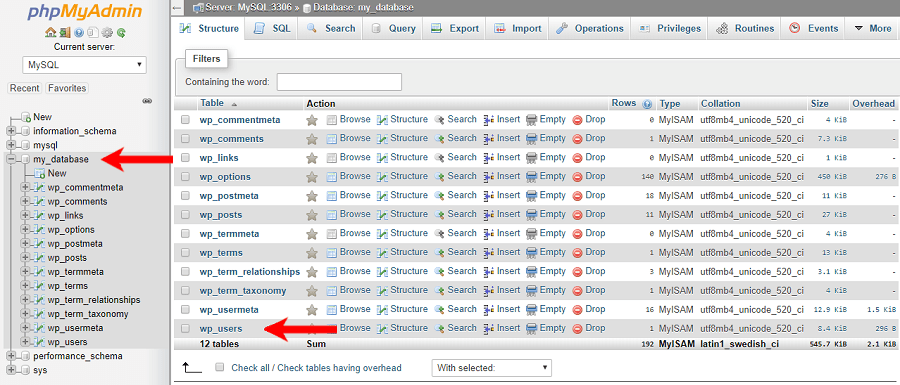
Find the “wp_users” table and click it.
This will bring you to a page like the one shown below. Here you will be able to edit any user on your WordPress website.
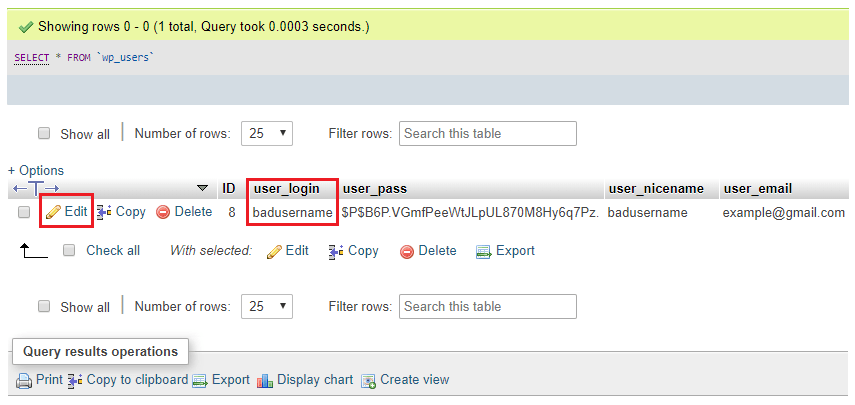
Find the username you want to change and click Edit.
On the next screen, enter your new desired username in the “user_login” field. Then, click Go at the bottom of the page.
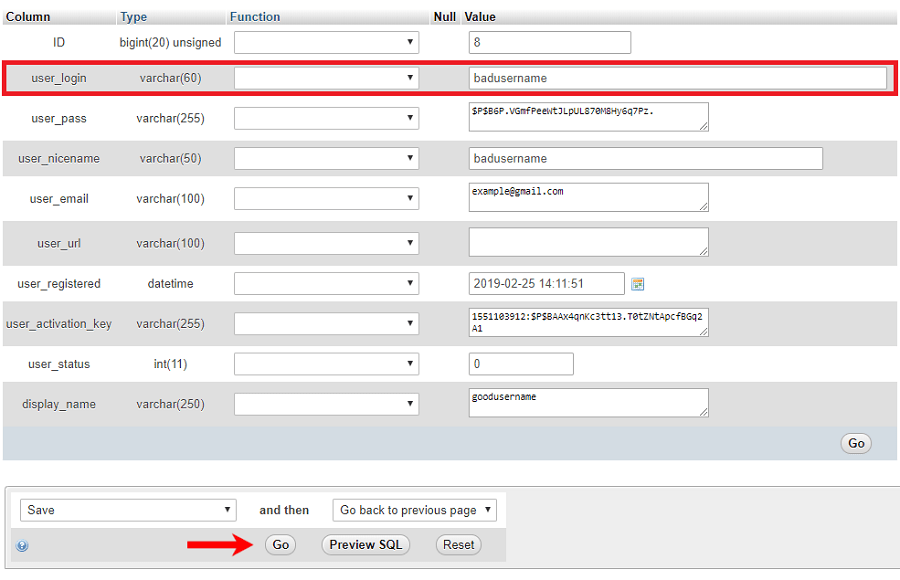
That’s it! You should now be able to login using the new username you have just created. Your password and email will remain the same as before.
Conclusion
While WordPress does not allow you to change usernames from your dashboard, it’s still easy to accomplish, either manually or with a plugin. Out of the three methods I have shown on this page, hopefully, one of them will work for you.
You may also want to see our step by step tutorial on how to change your WordPress password.
If you enjoyed this tutorial, please be sure to follow us on Facebook and Twitter. You can also find us on Freelancer if you need some help with your WordPress website or web development issues.

