What is a WordPress Child Theme?
A long time ago, there was no easy way of updating WordPress themes without losing all the custom styling and changes that you had made. The WordPress team and the community decided to solve this problem by introducing the concept of parent theme and child theme.
Child themes are used when you want to customize your current WordPress theme without losing the ability to update that theme. A child theme is not a standalone theme, but instead helps you modify or add to the files of an existing parent theme. This will allow you to safely alter styles, functions, layout, templates and more.
Even though you can do so much with a child theme, it’s still a good idea to try and get a solid framework (theme) like Genesis or Generatepress to begin with. Starting out with a good framework that’s already close to what you need, will save you a lot of time and trouble. If you find yourself having to overwrite a majority of the parent theme files, you would probably be better off creating an independent custom theme instead of a child theme.
Why would you need WordPress Child Theme?
Having a WordPress child theme can save you a lot of time and trouble when you make changes to your theme. If you have ever made any changes to the files listed below, you probably need to be using a child theme.
- When you edit style.css
- When you edit functions.php
- When you edit PHP templates
- When you edit JS Files
When you make changes to any of the files listed above and you update to a newer version of your theme, all of your changes will be lost. This is the reason a child theme is so important. It allows you to make these changes without ever being replaced by an update because your files will be saved in a separate child theme folder.
WordPress theme updates are crucial to keeping your website safe and functioning properly. Having a child theme in place will allow you to get updates right away without losing all your hard work and customization. It will also allow you to switch back to the parent theme in case your modifications cause some kind of issue.
Note: You will need access to your cPanel or download an FTP solution such as FileZilla before following the tutorial below.
Step 1: Create a Child Theme Directory
The first step in creating a WordPress child theme is to create a child theme directory. This directory will need to be placed in wp-content/themes alongside the parent theme. You can name this directory whatever you like. It is recommended (though not required) that the name of your child theme directory is appended with “-child”. You will also want to make sure that there are no spaces in your child theme directory name, which will result in errors.
Zuziko uses the GeneratePress theme (check out our GeneratePress review) so in the picture above we have called our child theme “generatepress-child”, indicating that the parent theme is the Generatepress theme.
Step 2: Create a New Style.css File
In this step we will need to create your child themes stylesheet (style.css) inside your child theme directory. In this new stylesheet, we will need to create a header. Copy and paste the code below into your new style.css file.
/*
Theme Name:   Zuziko Child Theme
Theme URI:    https://zuziko.com/
Description:  WordPress Child Theme
Author:       David Green @ Zuziko
Author URI:   https://zuziko.com/
Template:     generatepress <--- Change this to your parent theme directory name.
Version:      1.0.0
License:      GNU General Public License v2 or later
License URI:  http://www.gnu.org/licenses/gpl-2.0.html
*/
Most of that stuff in this file is self-explanatory. What you really want to pay attention to is the Template: generatepress. This tells WordPress that our theme is a child theme and that our parent theme directory name is generatepress. The parent folder name is case sensitive so make sure you get it exactly right.
Step 3: Create a New functions.php File
The next thing you need to do is create a new functions.php file in your child theme directory. We will use this new file to enqueue the parent and child stylesheets.
We can do this by addiing wp_enqueue_scripts action and use wp_enqueue_style() in your child themes functions.php.
Copy and paste the code below into your new functions.php file.
<?php
add_action( 'wp_enqueue_scripts', 'my_theme_enqueue_styles' );
function my_theme_enqueue_styles() {
    wp_enqueue_style( 'parent-style', get_template_directory_uri() . '/style.css' );

}
?>
Step 4: Activate Your New Child Theme
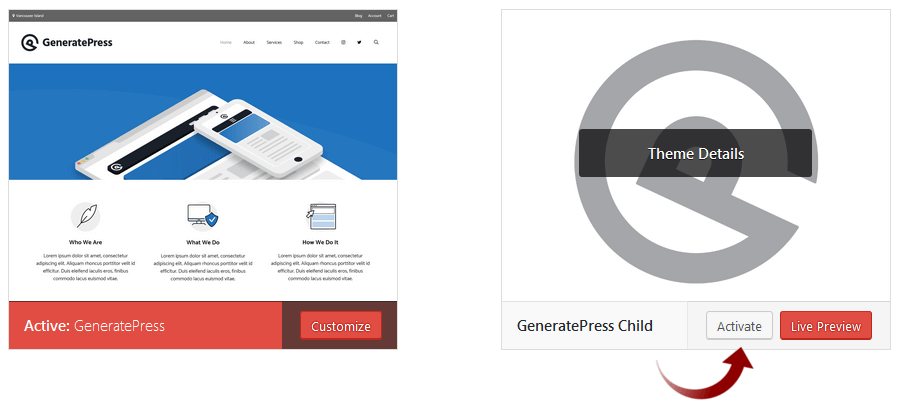
You are now ready to activate your new child theme (yes, it’s that simple). Log in to your WordPress Control Panel and go to Appearance > Themes. You should now see your child theme listed and ready for activation.
If you have made any customization prior to following this guide, you may need to resave your menu and theme options after activating your new child theme.
From this point on any customization you make to PHP templates, CSS files, JS files or the functions.php file will need to be done in your child theme directory.
My Final Thoughts
Other than the functions.php file we just created, any file you add to your child theme folder will replace the same file in the parent theme. You can also add new custom files or templates to your child theme directory, such as custom javascript or a template for a specific page or category.
Hopefully, this tutorial has helped you create your new WordPress child theme. If you run into any problems or just have a question, let me know in the comments below.
If you enjoyed this tutorial, please be sure to follow us on Facebook and Twitter. You can also find us on Freelancer if you need some help with your WordPress website or web development issues.


